Volume Discount
Customers in the market are always on the lookout for better deals, especially when they’re buying in bulk. These savvy deal-seekers and bulk buyers are constantly hunting for discounts that offer them more value for their money. Offering volume discounts on your store isn’t just about boosting sales—it’s about understanding what drives these keen shoppers and using that insight to turn them into loyal customers.
1. Why do volume discounts matter?
Now that we’ve grasped the concept of volume discounts, let’s explore why they are essential for your store:
- Enticing Bulk Pricing: Volume discounts offer new customers compelling value, encouraging them to choose your store over competitors by presenting lower prices for bulk purchases.
- Boost in Order Size: By incentivizing larger purchases, volume discounts increase both the average order value and the total number of products per order, maximizing your sales potential.
- Accelerate Inventory Turnover: Move slow-selling items off your shelves more efficiently. Volume discounts motivate customers to buy these products in greater quantities, helping you clear out excess stock quickly.
Implementing volume discounts isn’t just a sales strategy—it’s a powerful tool for enhancing customer satisfaction and optimizing your store’s performance.
2. Types of Volume Discounts
Before diving into the specifics, it’s crucial to understand the different types of volume discounts you can offer to customers in your store.
% Off for Each Item: As customers purchase more of the same item, the discount per item increases. Offer a fixed percentage off for each item in the cart once the customer buys a certain quantity. For example:
- Buy 2-4 items, get 5% off each
- Buy 5-9 items, get 10% off each
- Buy 10 or more items, get 15% off each

Fixed Discount on Each Item: Offer a specific dollar amount off each item once a customer purchases a certain number of items. For example:
- Buy 2 items, get $2 off each
- Buy 3 items, get $3 off each
- Buy 5 items, get $5 off each
Understanding these types of volume discounts can help you craft the most effective pricing strategies, catering to different customer preferences and driving more sales.

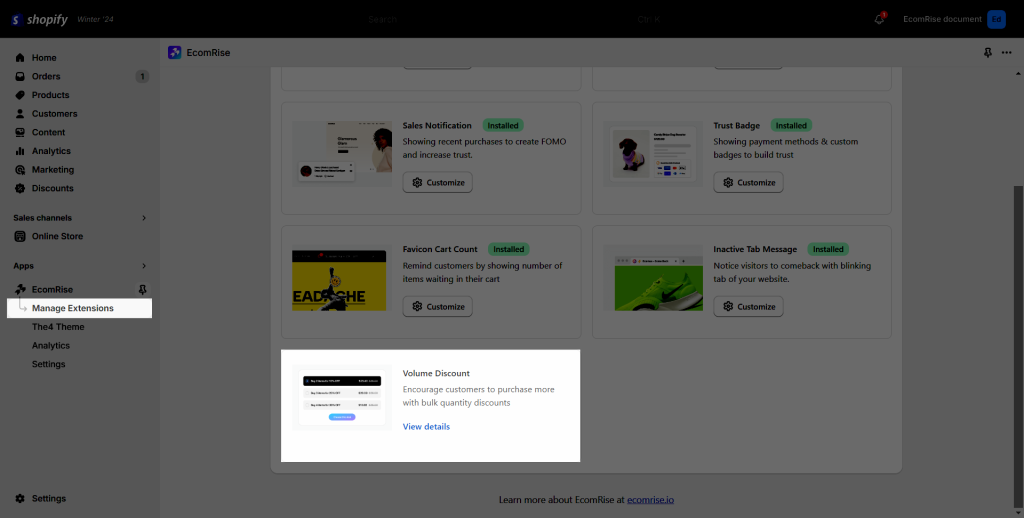
3. How to install the Volume Discount extension
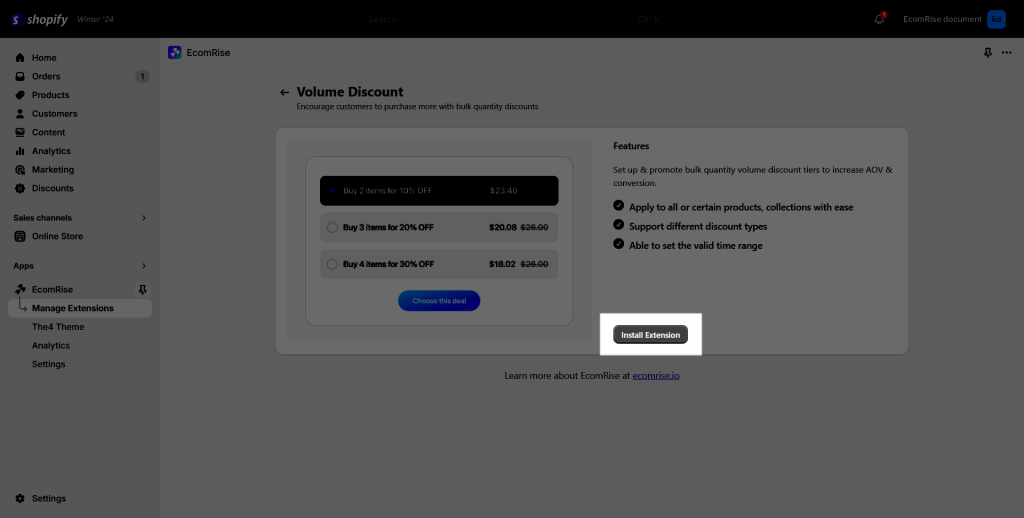
- From the EcomRise Dashboard, click Manage Extensions on the left sidebar.
- Click Install Extension
- If the app has not had enough permission before, it will ask you to update the app first.
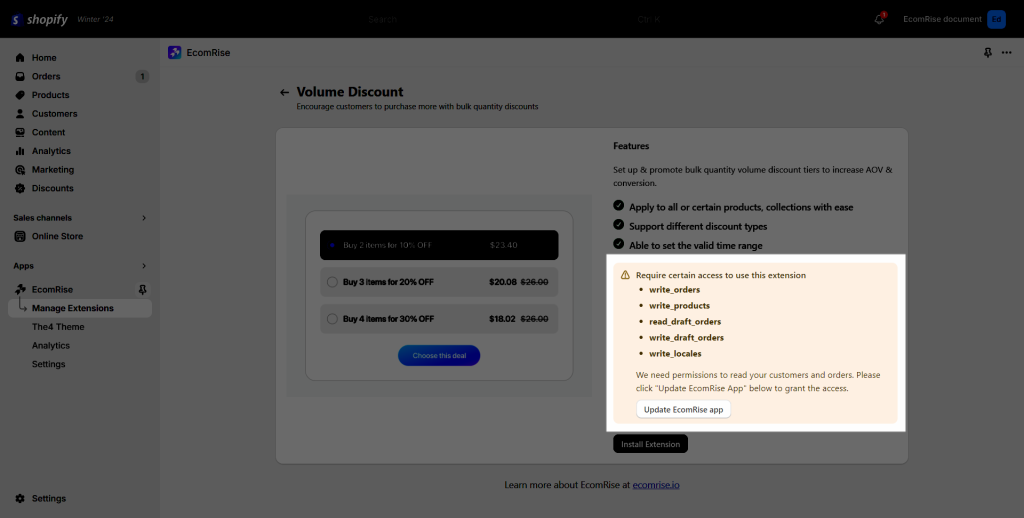
- In this step, please check and click the Update button to access permissions for the extension.
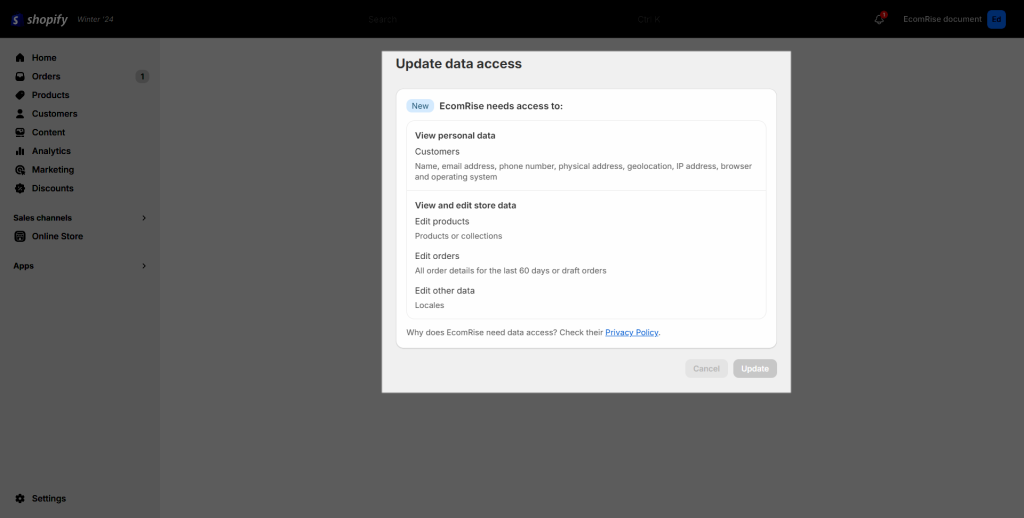
- Then you can install this extension after giving all the permissions.
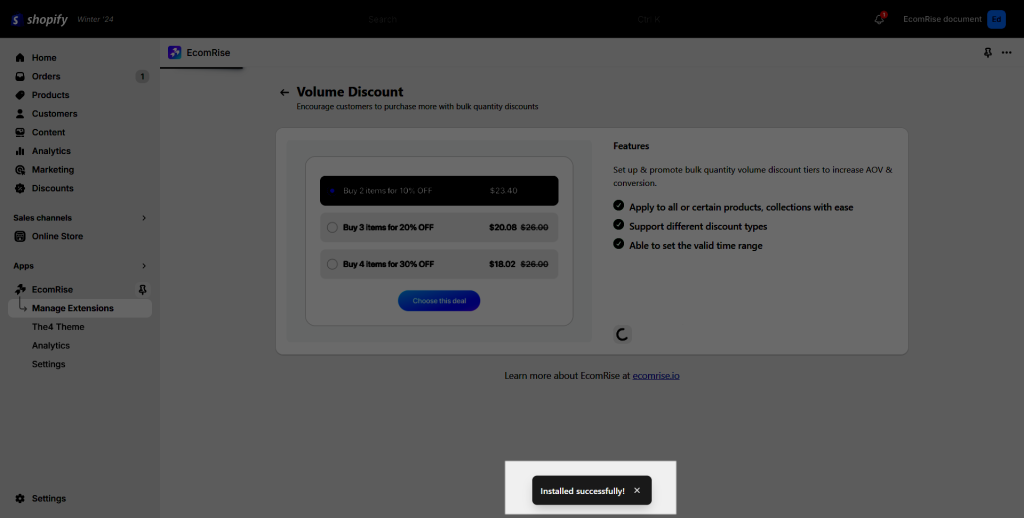
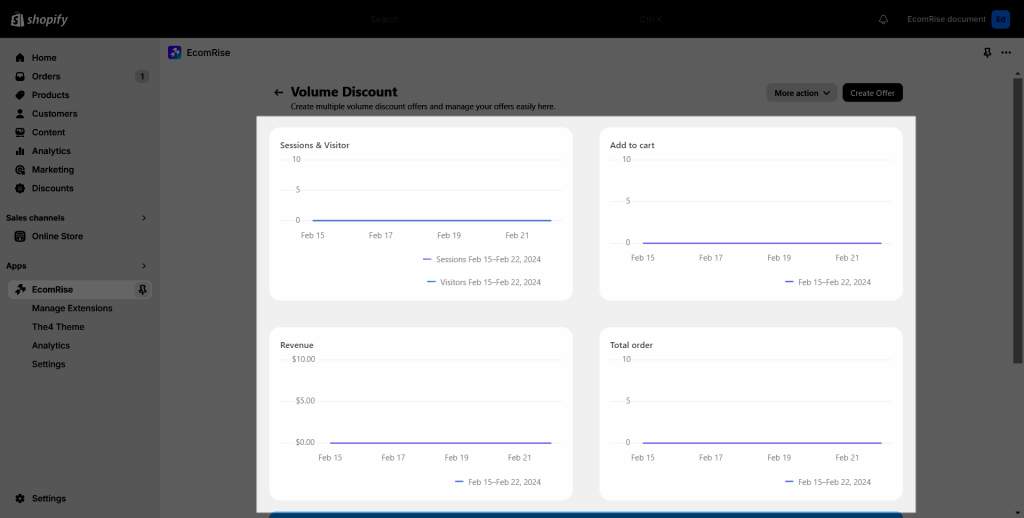
- After installing, at first, you can see this part from the Volume Discount dashboard. That will track and analyze the data on our app dashboard.
4. How to Create, Customize, and Add the Volume Discount to the theme page.
4.1 Create a new Discount Offer
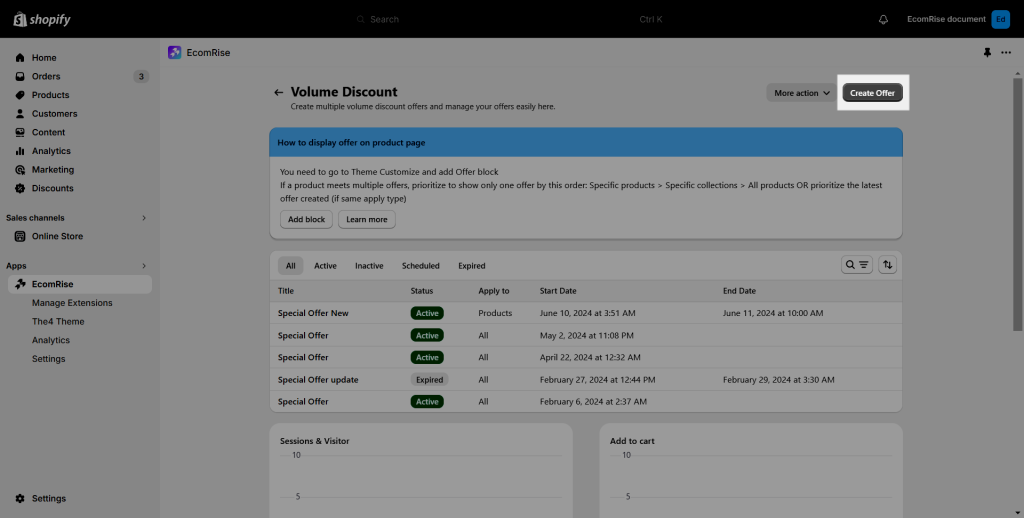
- Open the Volume Discount dashboard then choose Create offer to create the offer
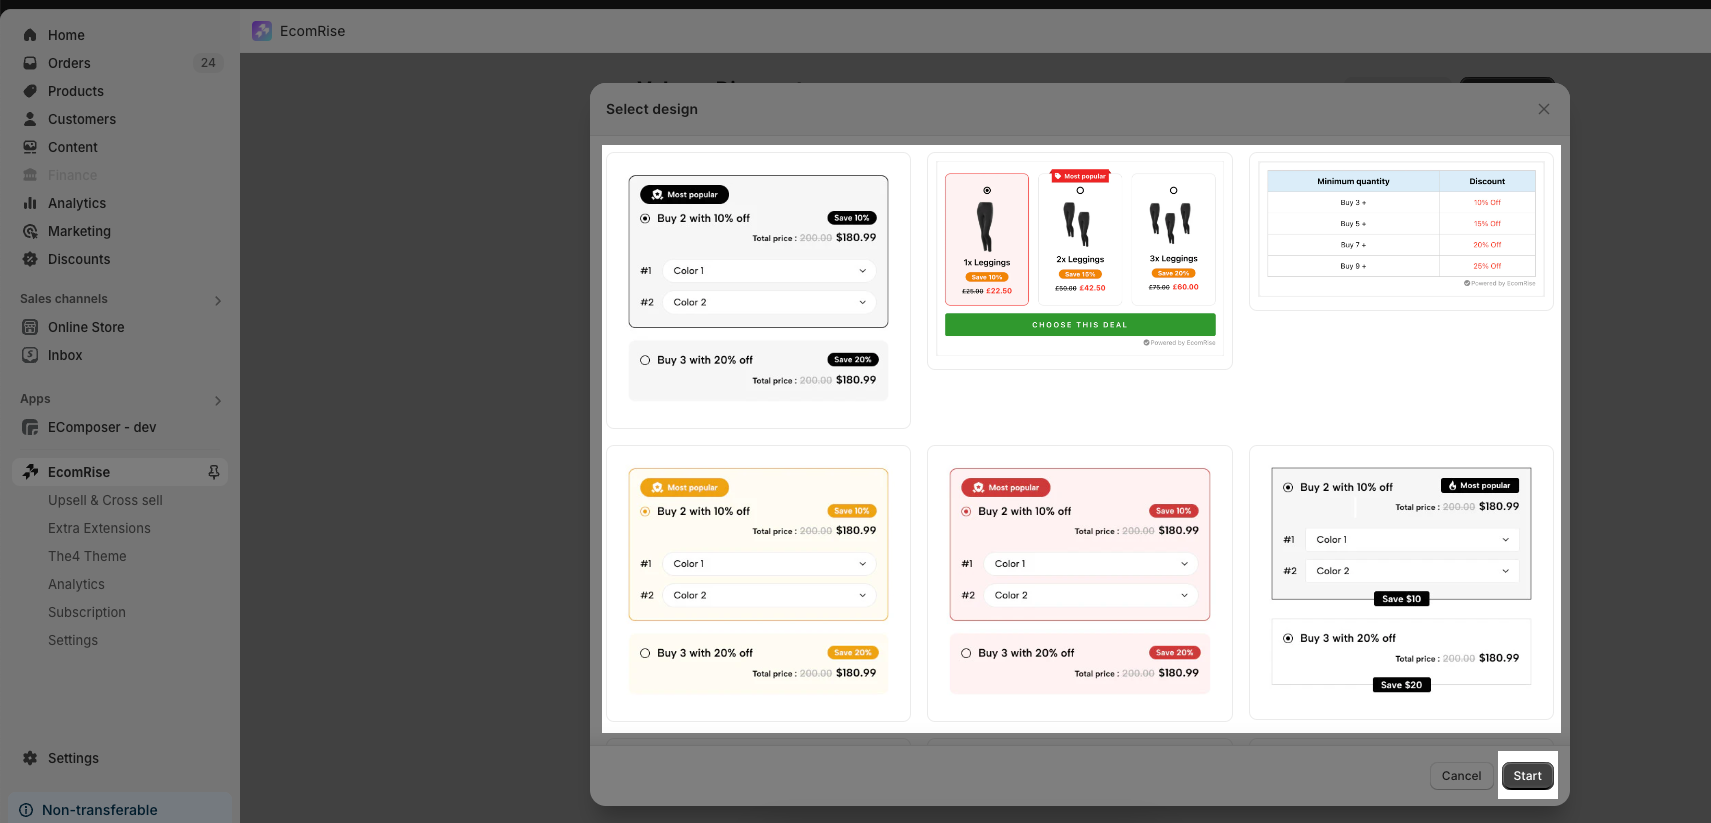
- Choose the built-in layout you want then hit Start
- Start to config the setting and Design
4.2 Setting Tab
You have 2 discount methods to choose:
- Shopify function: Utilize Shopify Functions to develop a new type of discount that is automatically applied to all items in the cart. Note: Shopify only allows creating up to 5 automatic discount apps.
- Draft order: EcomRise discount offer. If your customer qualifies for an EcomRise offer, a Draft Order with discounted prices will be created for them to proceed with checkout.
Note: If you have saved the offer, there is no way to edit the discount method again.
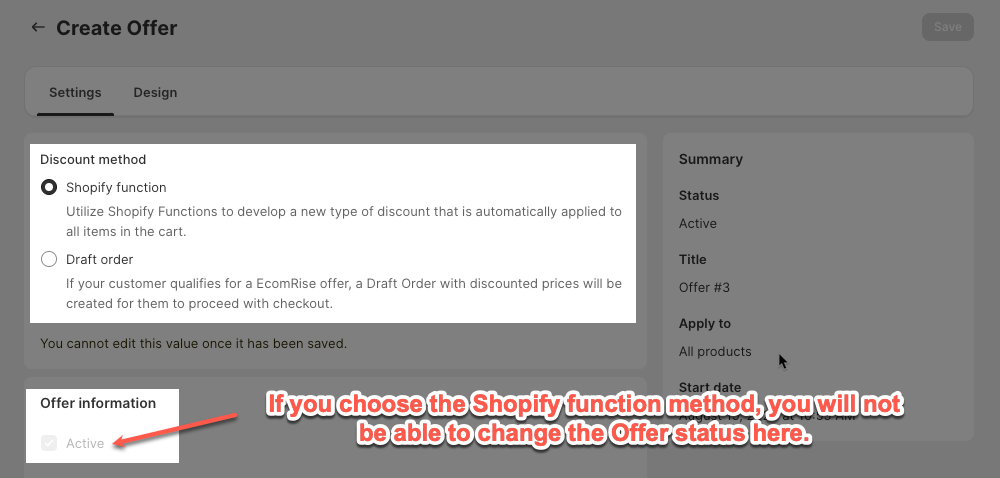
- Active: You can choose to active or inactive this extension.
- Title: You might change the headline to make it simpler to identify the offer you made.
- Block heading: You can enter a special heading for the discount block to capture’s attention of customers.
- Translation: Allow customer to translate the Discount title, and Discount block heading to all languages available on their store.
- Apply to: You will be able to select the Collection, Product, or Every Product that will come with this coupon form.
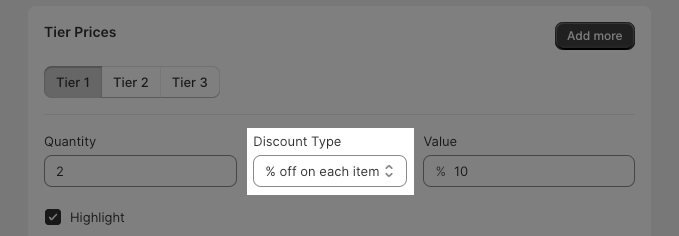
- Tier Prices: This will enable you to determine the pricing discount based on your preset parameters. Additionally, you can select a discount kind such as a Percentage off for each product or Fix the amount on each. Including the setting for the how many with the Quantity setting and the value Discount.
- Highlight: You can show a Feature badge for each Tier or not.
- Thumbnail: Add thumbnail image for Tier.
- Custom title: You can personalize the title for each Tier here, otherwise, the default extension title will be displayed.
- Subtitle: You can also add a Subtitle for each Tier here.
- Label: Fill in the label for the Tier to help it stand out more
- Highlight text: You can personalize the Highlight text for each Tier here, otherwise, the default extension highlight text will be displayed.
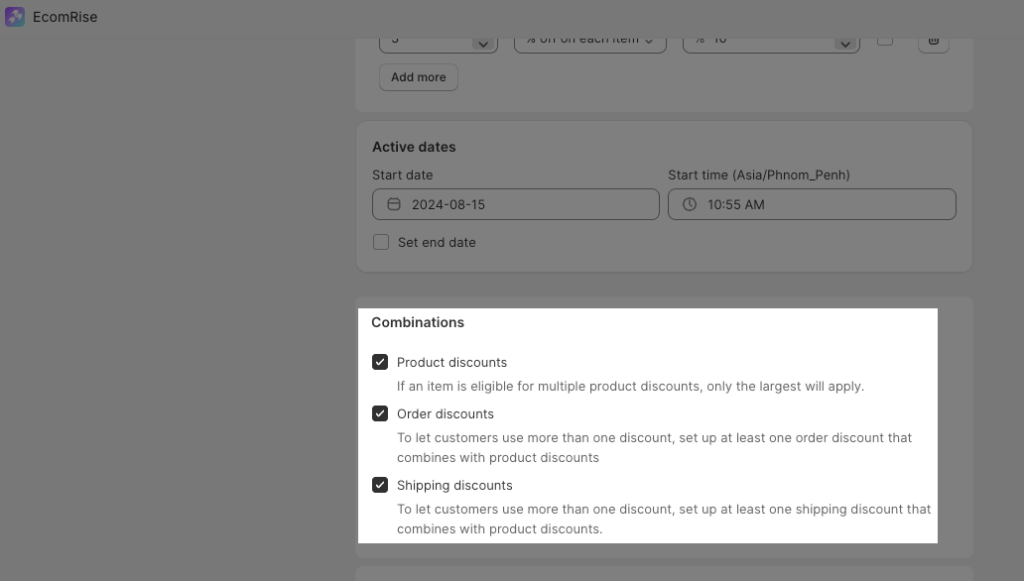
- Active date: It enables you to specify the beginning date and time as well as the ending date and time.
- Action after add to cart: You can choose the action after hitting add to cart button like Go to cart page or Reload page.
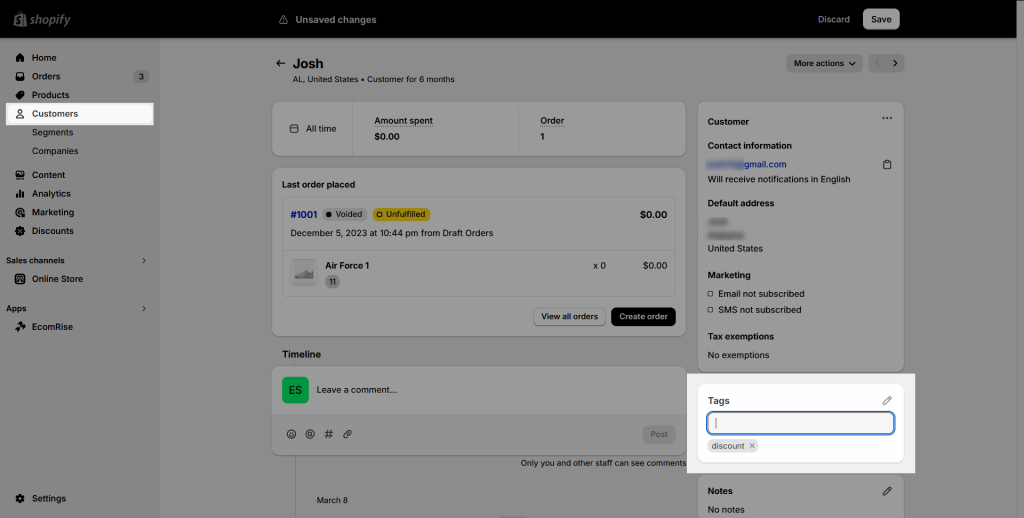
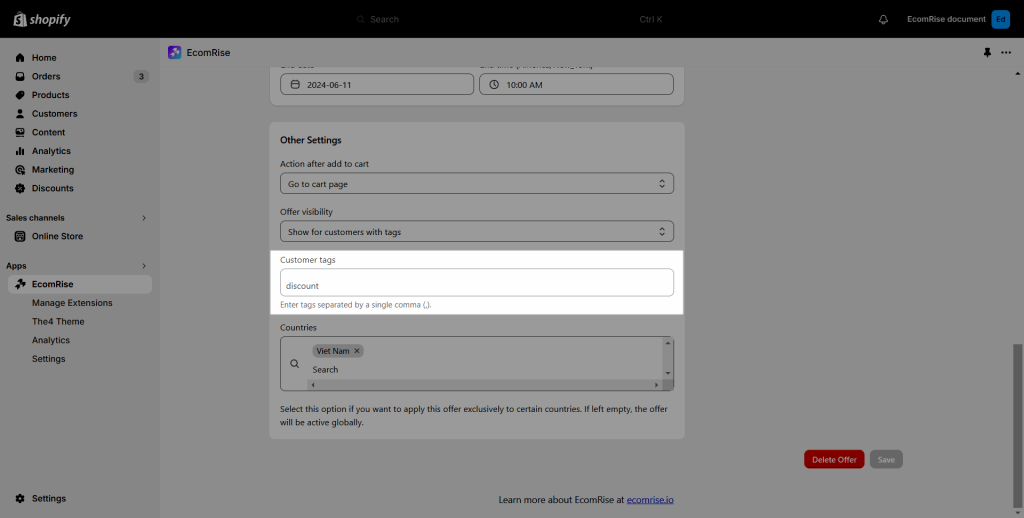
- Offer visibility: You can choose to show the bundle for the people you want. It could be for all, or for your guest or customer only.
- Countries: Select the specific country you want to show the bundle.
Note: With Offer visibility option, if you choose to Show/Hide for the customer with tags, you can find the tag you fill from Customer section in Shopify admin and put it to our app
For the Shopify function method, we have the additional option to combine discounts.
4.3 Design Tab
Design options:
- General setting: This includes the form’s default settings for the Background, Max-width, and Padding, Layout.
- Block heading: Here you can show Block heading or not as you want, you can also configure the typography, design, and alignment for Block heading.
- Thumbnail image: Some options to config for Image such as: width, height, border, background.
- Action button: Basic settings for the font style and backdrop, including font size, border-radius, color, button background, and more can be adjusted.
- Offer display: You can choose to apply the Grid or List layout to the form.
- Offer rules: You can set the Gap, Font size, Border radius, Text Color, Background color, Border color for the rules you set.
- Subtitle: Config Color and Typography for Subtitle.
- Label: Config Color and Typography for Label.
- Selected rule: You can set text color, background color, border color, radio color for the Selected rule.
- Featured badge: You can either choose to show Flash effect or not and set the color for effect as well as selected effect. You can also choose icon type to show, then set font size and border radius for it.
- Featured badge colors: Basic settings color for feature badge like text color, background color, selected text color, selected background color.
- Price: If you do not want to show the entire sale pricing or more, you have two pricing models to choose from: Display offer total price or Display reduction badge.
- Reduction badge: This includes the reduction badge’s settings for the Font size, Border radius, Color,…
- Variations: Choose to show variant selector and pre–select variant as well as other settings for style like background color, border color, text color.
- Table layout: Style text, color, border… for all items displayed on the Table layout.
4.4 How to add the offer to your product page
- Click Add block to add the offer to your product page.
- You can move the block to a different location while you’re in the theme editor.
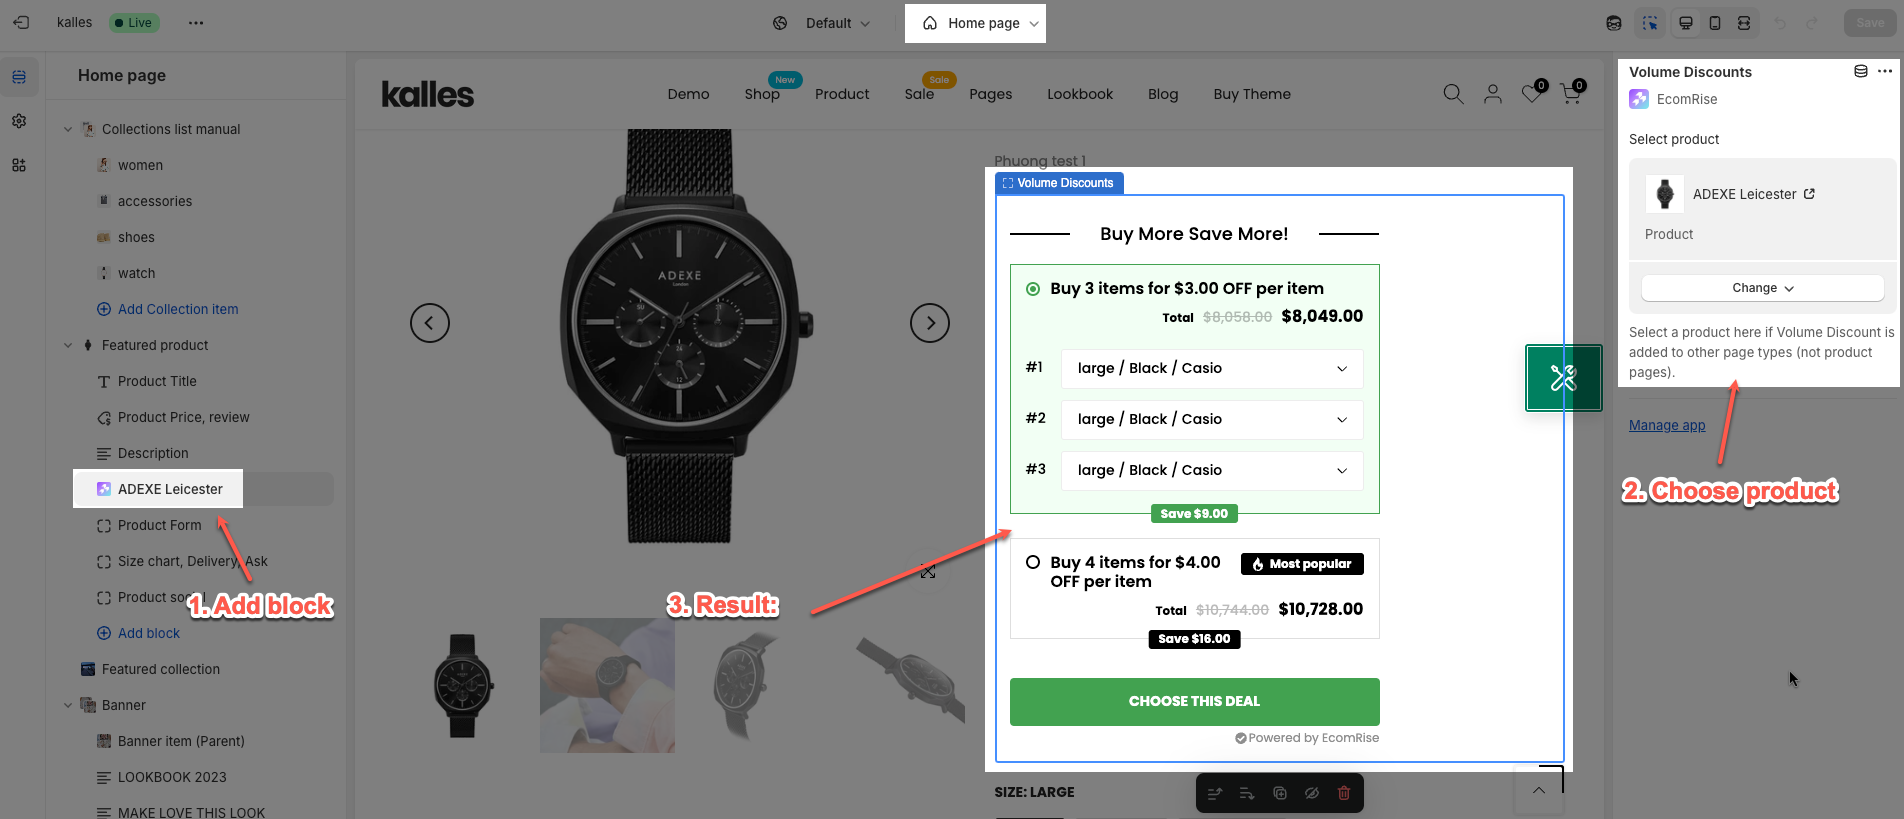
4.5 How to add the offer to other page types
In addition to the Product page, you can also add Volume discount block to other pages such as Home page, Collection page, …
- On the Theme Customize, open the page which you want to add Volume discount block.
- Add the block to the place that you want.
- Select discount product.
4.6 Filter Action
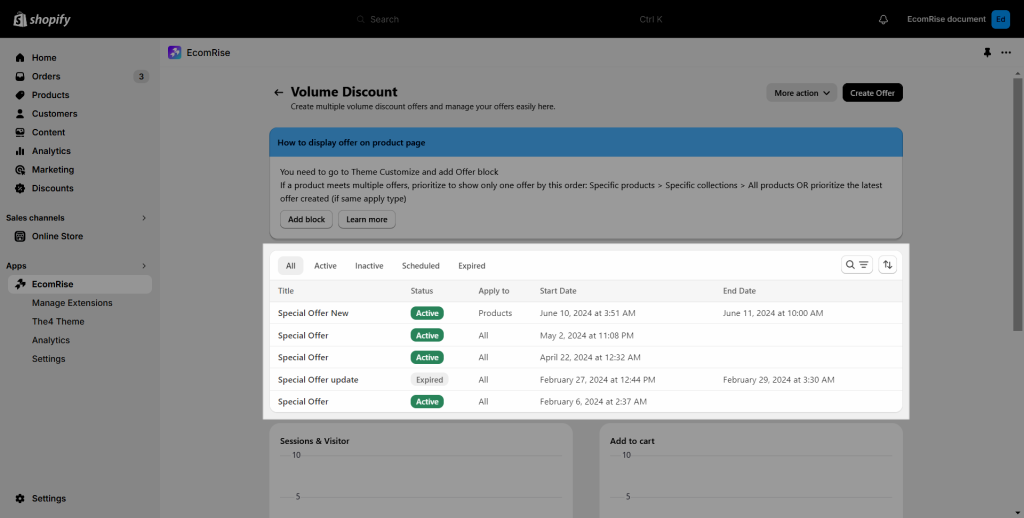
Once the Volume discount offer has been created, the status bar from the Dashboard of that extension can be seen at the bottom. Such as:
- All: That will highlight every offer you’ve made within that extension.
- Active: That will demonstrate that the deal is active on your website, as the published one.
- Inactive: That will demonstrate that the deal is inactive on your website, as the unpublished one.
- Scheduled: The following will display the prepared offer along with the time and date of display.
- Expired: That will maintain your previous offer, but those did run out of time.
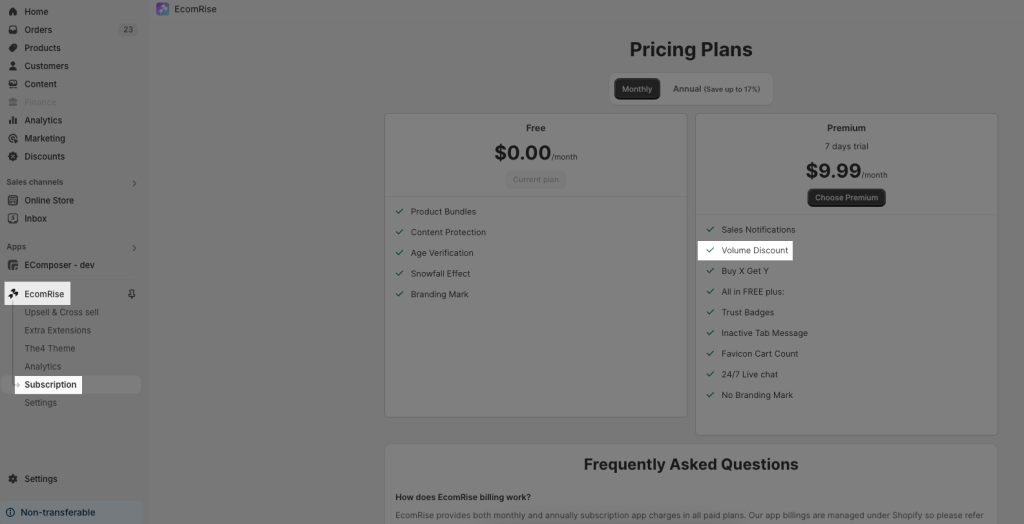
5. Upgrade plan for Volume Discount
- You need to upgrade your plan to the Premium plan to use the Volume Discount extension
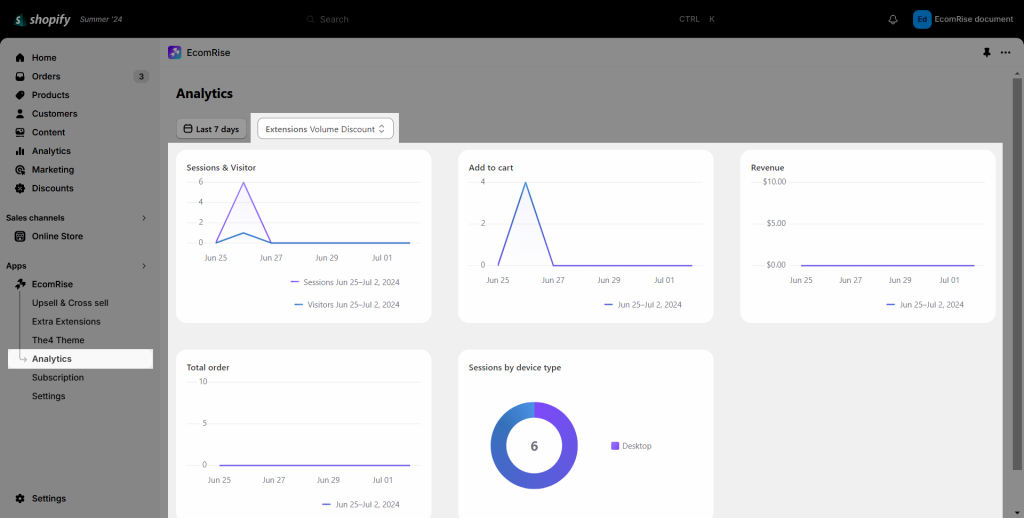
6. Analytic
You can view the data with our analytic dashboard for Volume Discount extension only.
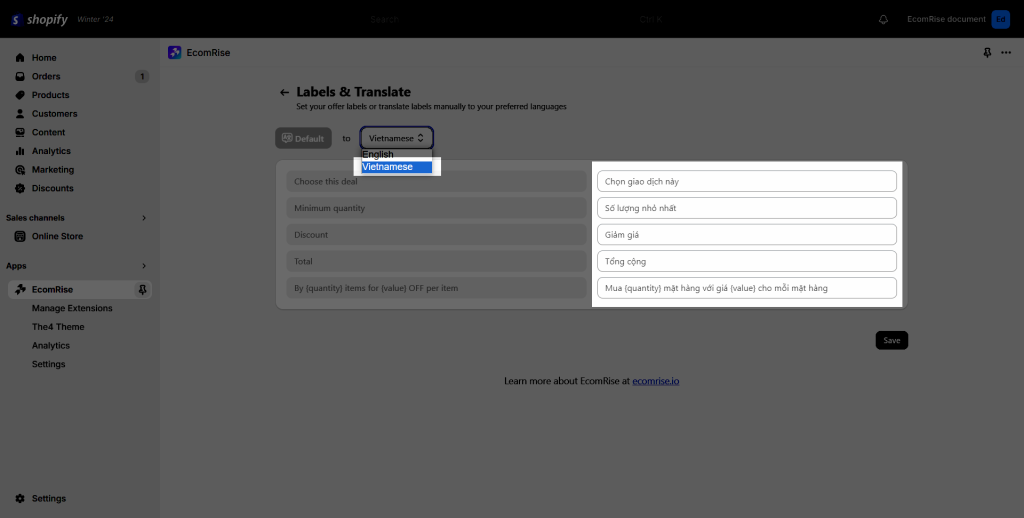
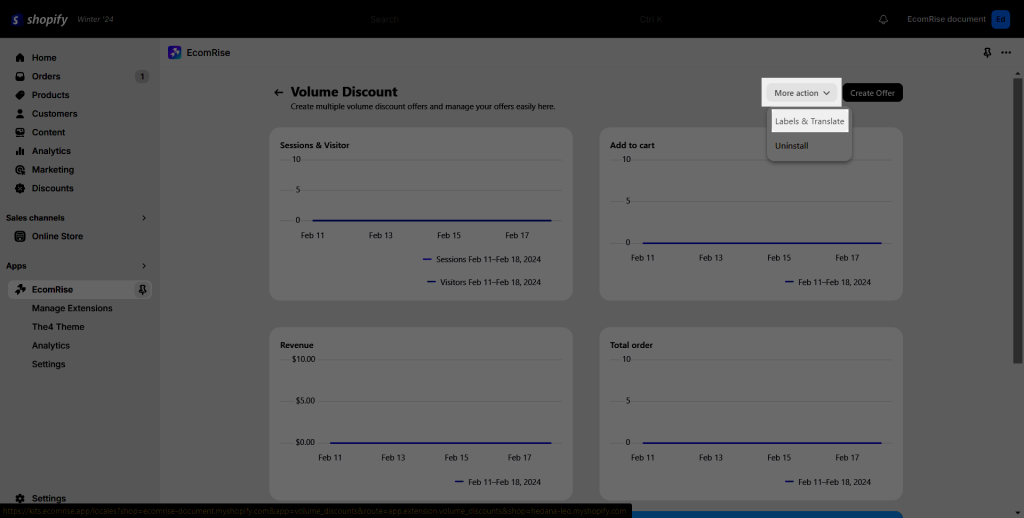
7. How to translate the content of the extension?
To translate the label in this extension, please open the extension -> More action -> Labels & Translate
- First, you need to add and publish the language in Shopify admin settings -> Languages. We add Vietnamese for example.
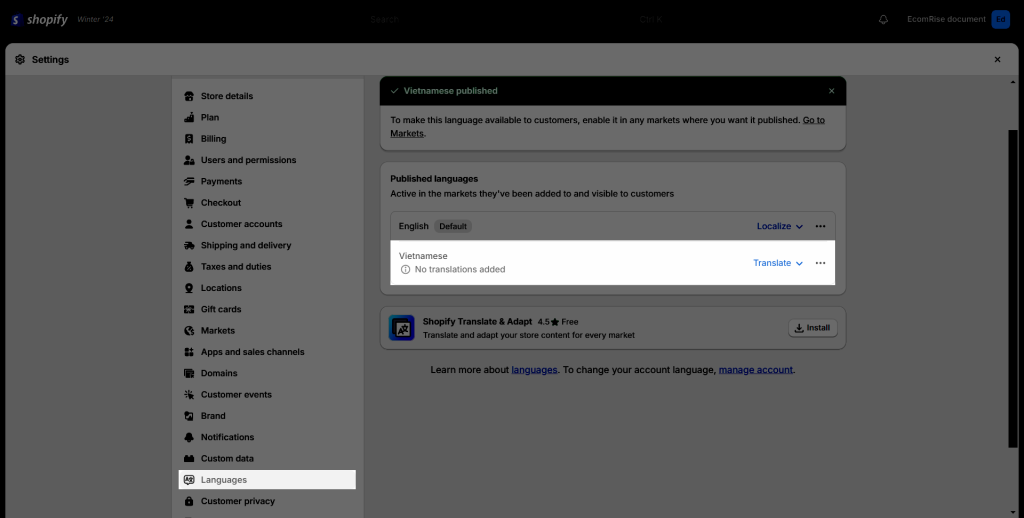
- Then you will able to see the language selector inside our app to translate this extension.